Laminate flooring is one of the most chosen types of flooring due to its durability, affordability, and installation simplicity. It gives the luxury appearance of hardwood without the expense and maintenance. Most homeowners prefer installing laminate flooring themselves since it is equipped with a click-lock system, which enables planks to be clicked together securely without adhesives or nails.
In this guide, we take you through everything you need to know about laminate flooring installation, from subfloor preparation to installing the last plank. Whether you are redoing one room or renovating an entire home, these step-by-step instructions will guide you in creating a perfect flooring makeover.
Why Choose Laminate Flooring?
Laminate flooring is extremely resistant to moisture and scratches, so it is ideal for busy spaces such as hallways, kitchens, and living rooms. Laminate flooring has the look of real wood, stone, or tile but with much less upkeep.
Major Advantages of Laminate Flooring:
Durability: Impact and scratch-resistant, best for households with children and pets.
Affordability: It costs much less than hardwood or tile flooring.
Easy to Maintain: Needs minimal cleaning—only sweep or mop every now and then.
DIY-Friendly Installation: Has an interlocking system for glueless installation.
Tools and Materials Needed
Before you start your laminate flooring installation, make sure you have the tools and materials needed within reach.
Good preparation guarantees an easy installation and avoids problems such as uneven floors or gaps between planks.
| Tools & Materials | Purpose |
|---|---|
| Measuring Tape | To measure floor area accurately |
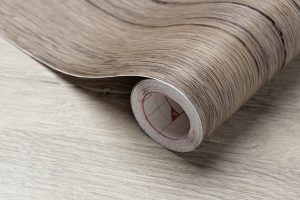
| Laminate Flooring Planks | The main material for the flooring |
| Underlayment | Provides cushioning and moisture resistance |
| Spacers | Ensures expansion gap around walls |
| Jigsaw or Flooring Cutter | For cutting planks to fit edges |
| Rubber Mallet | Helps to tap planks securely in place |
| Pull Bar | For locking planks in tight spaces |
Step-by-Step Installation of Laminate Flooring
Step 1: Prepare the Subfloor
Begin by cleaning and leveling the subfloor. Take out the dust, debris, or existing flooring material. If the subfloor is uneven, apply a leveling compound to provide a level surface. A level subfloor will help to avoid squeaks and gaps between the laminate flooring.
Step 2: Install Underlayment
Install the underlayment to offer moisture protection, sound reduction, and padding. Unroll it evenly on the floor and cut it to size. Don’t overlap the underlayment to have a smooth base.
Step 3: Acclimate the Flooring
Laminate flooring will change size with changes in temperature and humidity. Leave the planks in the room for a minimum of 48 hours prior to installation to avoid warping after installation.
Step 4: Plan the Layout
Determine the direction of the planks prior to their installation. Planks are usually laid parallel to the longest wall or along the natural light direction. This assists in achieving a roomy and pleasing visual appearance.
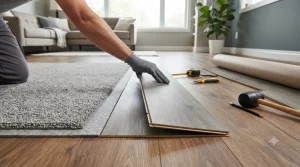
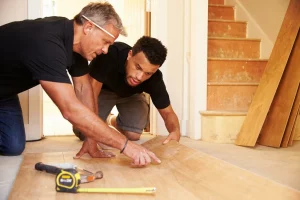
Step 5: Lay the First Row
Begin in one corner and place spacers along the wall to maintain a 10-12mm expansion gap. Lay the first plank and connect the next one at an angle before snapping them together. Repeat this process along the first row.
Step 6: Stagger the Planks
For the purpose of attaining a wood flooring appearance in a natural state, stagger planks’ joints by at least 12 inches. This tightens up the floor’s construction and helps make the flooring have better visual continuity.
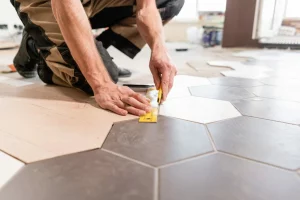
Step 7: Cut Planks for Edges and Corners
Use a jigsaw or flooring cutter to trim planks for edges and corners. Measure twice to cut once to prevent errors. When working around door frames, cut the door casing to have room for the planks to go beneath.
Step 8: Install the Last Row
The last row will need to be trimmed so that it fits. Utilize a pull bar and rubber mallet to secure the planks firmly in place.
Step 9: Install Baseboards and Trim
To finish the installation, fill the expansion gaps with quarter-round trim or baseboards. This produces a clean and professional look.
Step 10: Clean and Enjoy Your New Floor
Sweep or vacuum the new laminate floor to clean off dust and debris. For deeper cleaning, use a damp mop, but avoid excessive water to help sustain durability.
Laminate Flooring Maintenance Tips
Good care prolongs the life of laminate flooring. Just follow these easy tips to maintain it as good as new:
| Maintenance Tip | Details |
|---|---|
| Use a Soft Broom | Prevents scratches and removes dust |
| Damp Mop Occasionally | Use a slightly damp mop for deeper cleaning |
| Avoid Excess Water | Too much moisture can damage laminate planks |
| Use Furniture Pads | Prevents dents and scratches from heavy furniture |
| Clean Spills Immediately | Protects planks from swelling or warping |
Also Read:
Pros and Cons of Laminate Flooring: A Detailed Guide
Mistakes to Be Avoided
Avoid these mistakes while installing laminate flooring:
Omitting the Underlayment: Moisture damage and uneven floor.
Not Providing Expansion Gaps: Buckling during plank expansion.
Neglecting Acclimation Time: Warping after installation.
Utilizing Excess Water for Cleaning: Weaken the laminate planks in the long run.
By adhering to the proper installation methods and maintenance guidelines, you can keep your laminate flooring looking stunning and long-lasting for years.
Final Thoughts
Laminate flooring installation is a simple yet rewarding project that can transform your space. With the right tools, preparation, and technique, even beginners can achieve a professional-looking finish. Whether you’re renovating a single room or an entire home, laminate flooring is a cost-effective, stylish, and long-lasting solution.
This manual gives you all the information required to have a proper installation. Your laminate floors will remain strong and lovely for a long time as long as you follow these guidelines and take proper care of them.